
by EM2WL | Aug 26, 2015 | Breakfast, Main Dish, Recipes
Having trouble reaching that Protein Macro but still craving a sweet, carb-filled breakfast, or maybe in the mood for breakfast at dinner? Enjoy this great 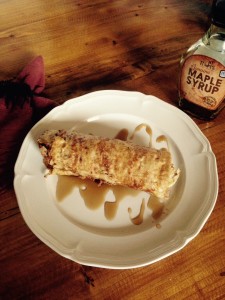 recipe packed full of protein that you can enjoy any time of the day, while still satisfying that craving for something sweet. And the best thing? It is very easily adaptable depending on ingredients you have on hand and the portion size you would like to create… Also, feel free to add berries or bananas to switch things up – use your imagination and build on the basic recipe!
Here is what you will need:
~ Eggs (or Egg Substitute). You will need at least 2 eggs or 1/2 cup egg substitute, more if you would like a bigger portion
~ Cinnamon – 1/2 tsp
~ Nutmeg – 1/4 tsp
~ Salt – 1/4 tsp
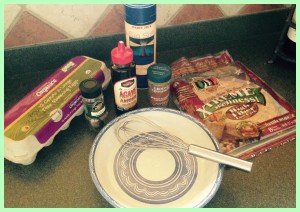
The Basic Ingredients
~ Agave or any Sweetener of Choice (sugar, maple syrup, coconut sugar, artificial sweetener) – amount necessary will vary on quantity of eggs used. For a large 3 egg serving I added 2 Tbsp Agave
~ Tortillas or Wraps (again, quantity depends on serving size you would like to create) – For a large meal, I use 2 High Protein, High Fiber Whole Wheat Wraps
~ Cooking Spray
~ Maple Syrup to top the final product

Dip each tortilla in egg mixture and cook
Mix/whisk the first 5 ingredients in a pie plate sized sized dish until well combined (something big enough to dip the wraps or tortillas in…)
Preheat a frying pan and spray with cooking spray
Dip one of the wraps/tortillas in the egg mixture, coating thoroughly, and place in pan, flipping to cook on both sides. Repeat if using 2 wraps/tortillas. Transfer cooked tortillas to a plate
Spray your pan with cooking spray again, then pour in your remaining egg mixture, cooking on both sides to create an omelet of sorts
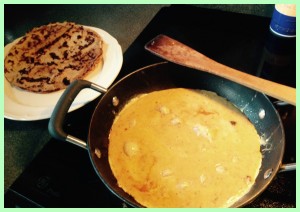
Cook the remaining egg mixture like an omelet
Stack your wrap/tortilla(s) and the egg mixture “omelet” and roll up creating a large log-shaped creation
Top with Maple Syrup and enjoy!
This recipe satisfies that craving to eat something sweet, but also really packs a protein punch! Your egg “omelet” serves to help make your roll-up into a generous portion, but because it is sweetened and flavored to taste like French Toast, you aren’t eating the same old boring plain eggs yet again!
Prepare to be filled up! The “finished” photo was taken on a full-sized dinner plate …. that’s a big meal!

by Trish Adams | Nov 24, 2014 | Recipes
Team EM2WL would like to extend a warm welcome to our newest guest blogger, Andréa, from Andréa’s Protein Cakery! Today Andréa shares a high protein snack that will satisfy your sweet tooth!
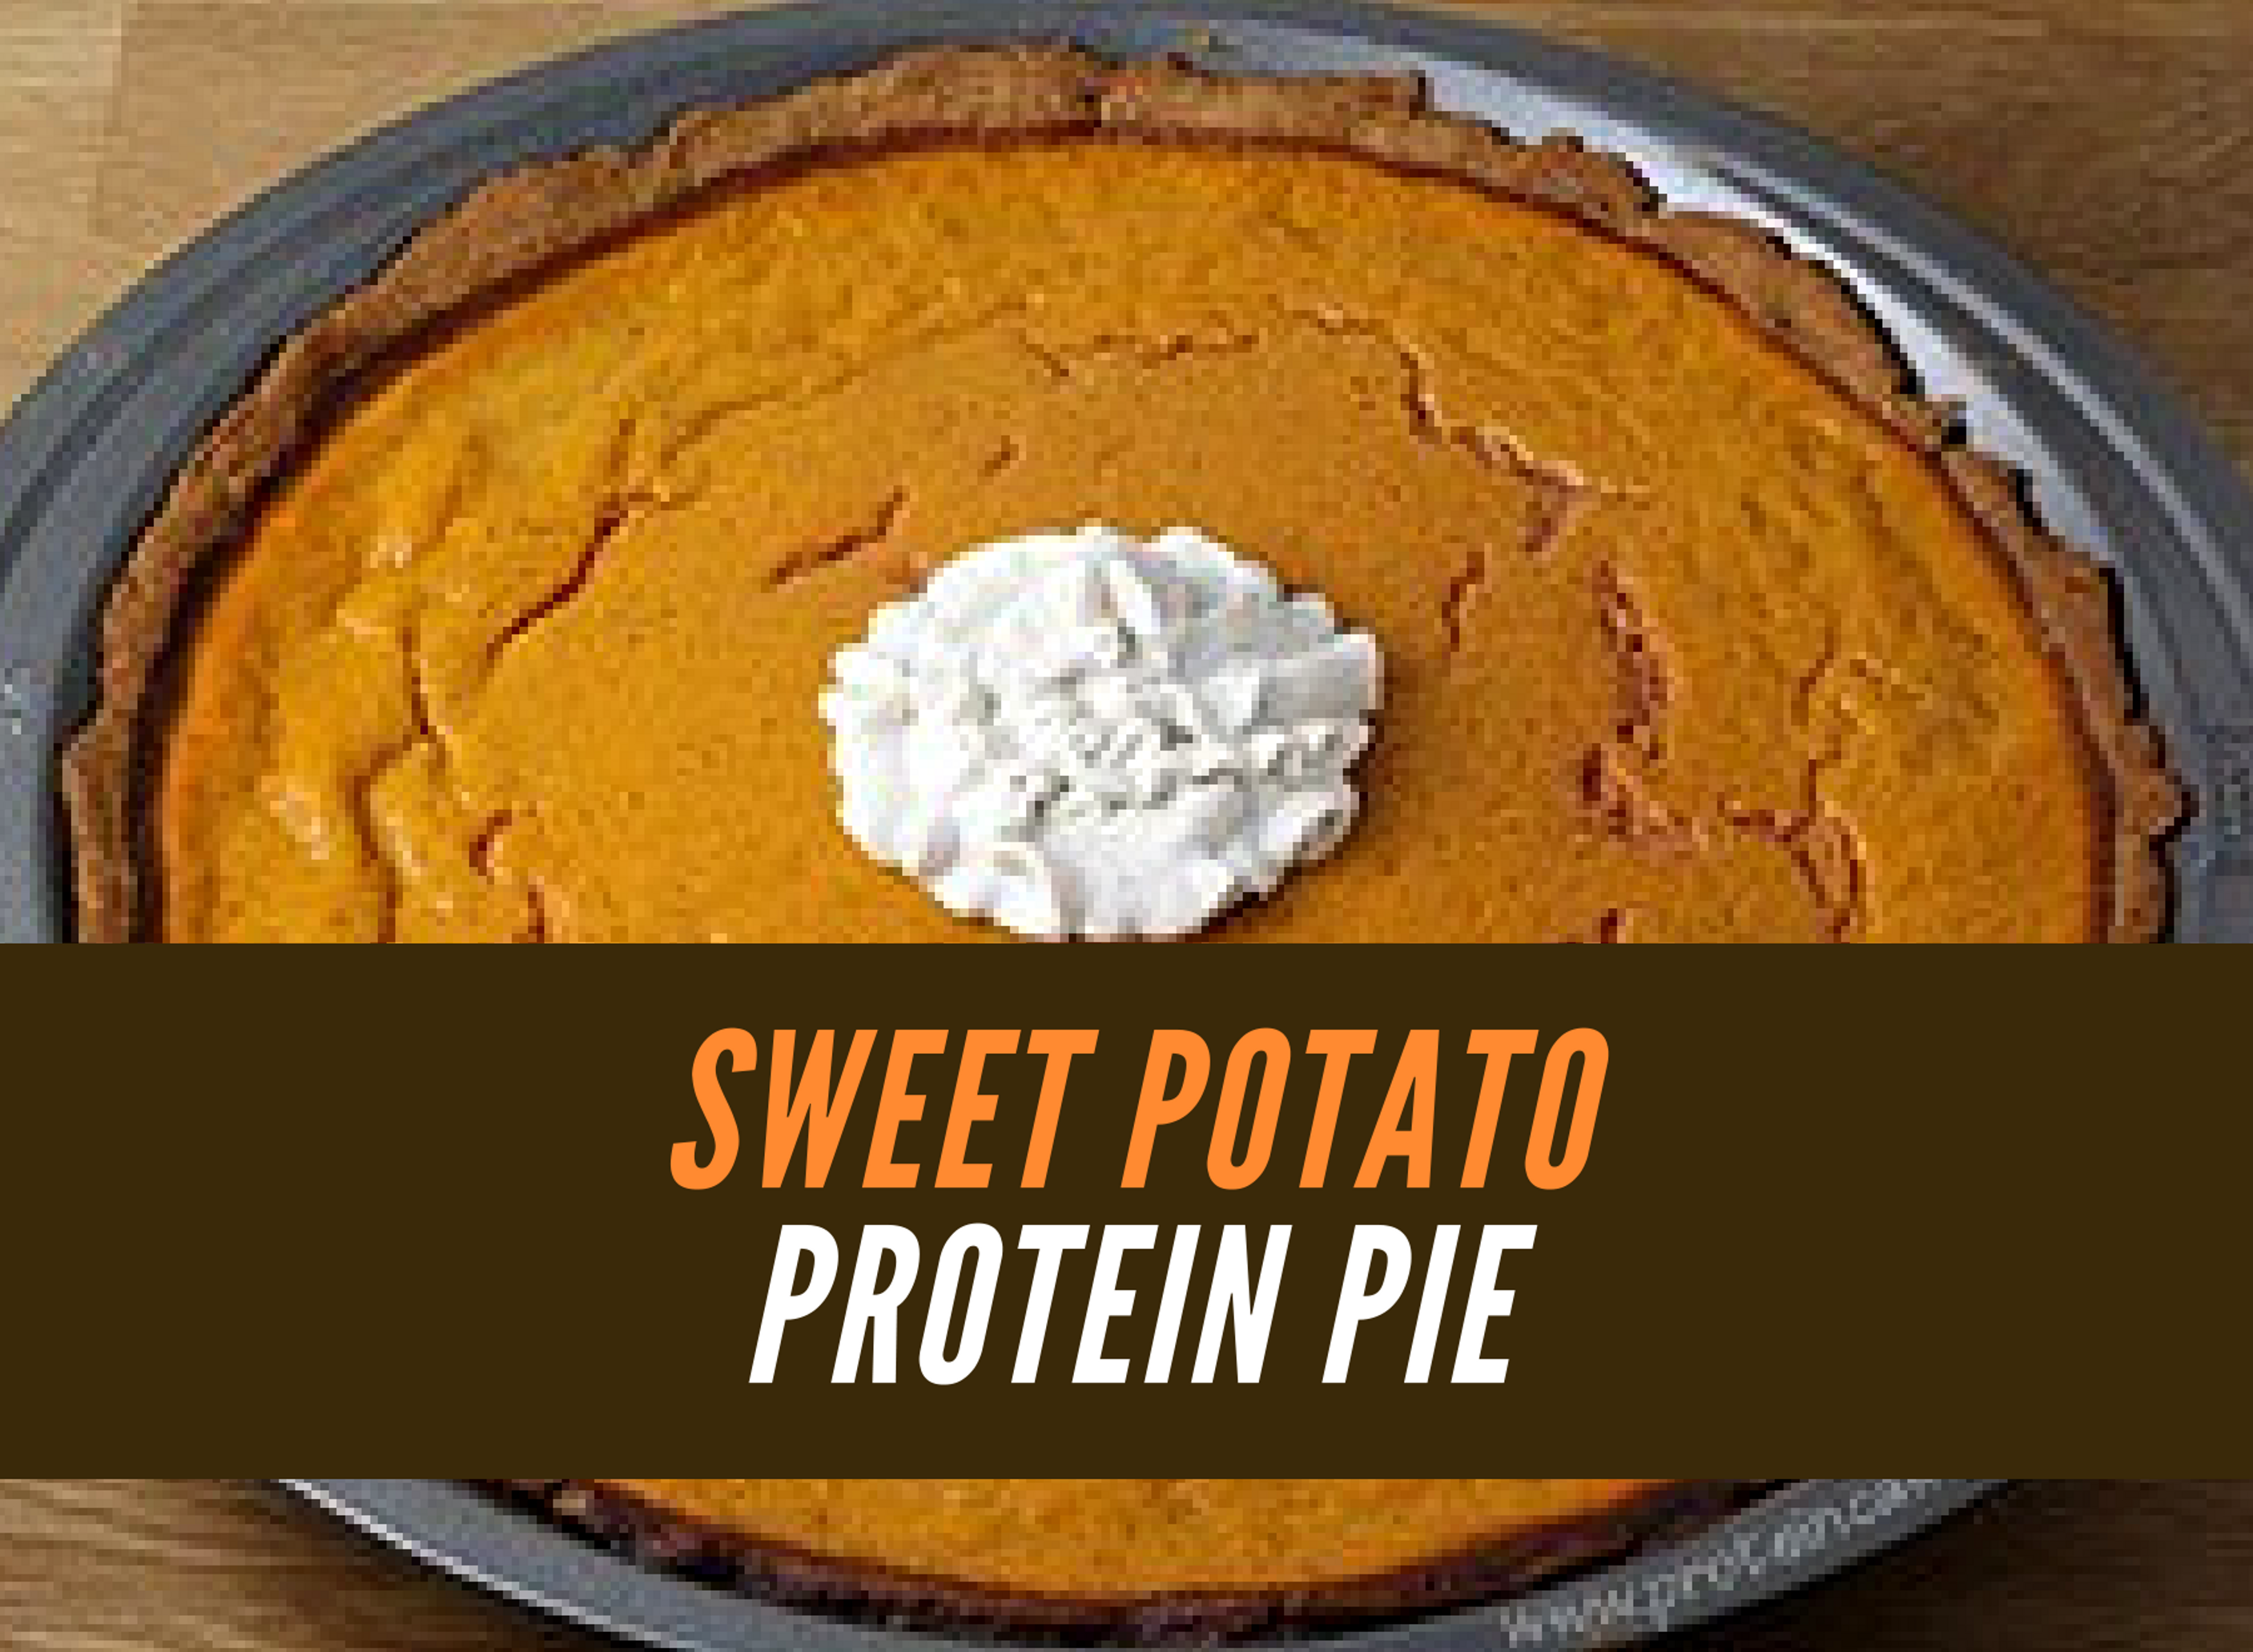
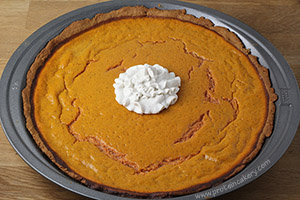
Perfect for your Thanksgiving feast, a healthy, high-protein sweet potato pie!
To transform a traditional recipe into Sweet Potato Protein Pie, I made some simple recipe exchanges. Instead of using a traditional pie crust, I made one using almond butter and vanilla rice protein powder. It tastes great, and has the flaky crust texture you’d expect in a pie. And instead of sweetened evaporated milk in the filling, I mixed some vanilla whey protein powder with water. Easy! I left out the added sweetener here, but if you’d like a sweeter protein pie I suggest adding ¼ to ½ cup coconut sugar or date sugar.
With ingredients like these, you can enjoy Sweet Potato Protein Pie anytime!
Sweet Potato Protein Pie
Ingredients
Crust
- 1/3 cup almond butter
- 1/3 cup filtered water
- 1/2 cup vanilla rice (or pea) protein powder
- 1/4 teaspoon ground cinnamon
Filling
- 1-1/2 cup cooked sweet potato
- 1 cup filtered water, separated
- 2 Large eggs (whole)
- 1/2 cup natural vanilla whey protein powder
- 3/4 teaspoons ground cinnamon
- 1/2 teaspoon ground nutmeg
- 1/2 teaspoon sea salt
Directions
|
Crust
|
|
|
Preheat oven to 325F (163C).
|
|
|
In a medium bowl, mix almond butter with water until smooth.
Add in rice protein and cinnamon. Mix until combined. (If the batter is sticky, add a little more rice protein.) |
|
|
Press into 9" pie pan.
Bake for about 10 minutes, then remove from oven. |
|
Filling
|
|
|
| Meanwhile, puree sweet potato with 1/2 cup water. |
|
|
| Pour into a bowl, and add eggs. Mix until smooth. |
|
|
| Combine with remaining ingredients (including the remaining 1/2 cup water) and mix well. |
|
|
Pour into pie crust.
Bake for about 40 minutes, until the center of the pie is firm to the touch. |
|
|
Let cool completely.
Top with cashew whipped cream (if desired, not included in macros) and enjoy! |
Note
Makes one 9" pie (8 servings)
Per serving:
Protein: 14g
Carbs: 10g
Fiber: 2g
Sugar: 3g
Fat: 7g
Calories: 162
Follow Andréa’s Protein Cakery!
Recipe blog: www.proteincakery.com
Instagram: instagram.com/proteincakery
Facebook: www.facebook.com/proteincakery
Twitter: twitter.com/ProteinCakery
Pinterest: www.pinterest.com/proteincakery/
Youtube: www.youtube.com/proteincakery
by EM2WL | Jun 27, 2014 | Main Dish, Recipes
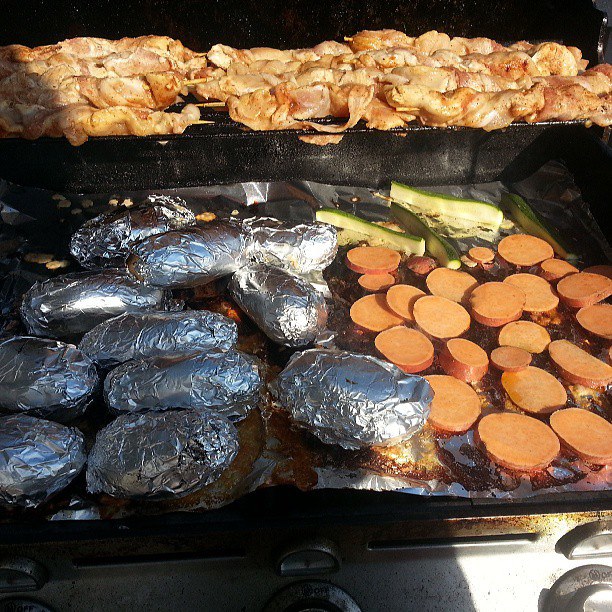
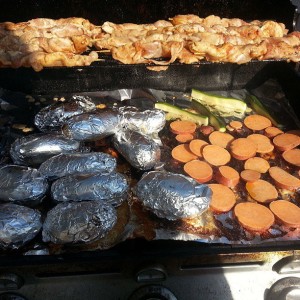
In our family, summertime (or really any time for that matter!) is grilling time. The other night, we made these awesome chicken bacon skewers and they are UNBELIEVABLY good for being such a simple recipe.
Smoky Chicken Bacon Skewers
Make these chicken kabobs for your next barbecue. Guaranteed to be a crowd pleaser!
Ingredients
- 3lb Boneless, skinless chicken tenders (or chicken breast cut into chicken-tenders type strips)
- 1lb Bacon
- 1/2 cup Barbecue sauce
- 1/2 cup Asian-style vinaigrette (I use Bolthouse Farms)
- 1 tablespoon Garlic (crushed)
- 1 tablespoon Smoked paprika
- 1/2 tablespoon Chili powder
- 1 teaspoon Salt
- 1 teaspoon Black pepper
Directions
|
|
| In a large bowl whisk together barbecue sauce, vinaigrette, garlic, paprika, chili powder, salt, and pepper. Pour into 9 x 13 pan. Set aside. |
|
|
| Thread chicken tenders onto skewers. Wrap bacon around chicken and secure ends. |
|
|
| Place skewers in pan and cover with marinade. Allow the bacon-wrapped chicken to marinate for about 4-6 hours. |
|
|
| Grill the skewers on low heat for about 20 minutes. Then move to high heat and finish grilling to crisp the bacon, about 5 minutes. |
Note
We like to serve these with grilled veggies (sweet potatoes, baked potatoes, and zucchini). Such a simple and delicious meal!
Makes 12 skewers. Nutrition facts per skewer: 202 calories, 3 g carbohydrates, 10 g fat, 26 g protein
Becca is a busy wife and homeschooling mother to five children ages 5 to 13. About three years ago, she embarked on a journey to health and fitness that resulted in the loss of approximately 100 pounds. Today, she is a competitive powerlifter and strongwoman who loves ice cream and deadlifts. As an ISSA certified personal trainer, she is passionate about helping women to get started on a lifestyle of strength and fitness.
by Trish Adams | Apr 9, 2014 | Main Dish, Nutrition, Recipes
Kellie from The Suburban Soapbox is back to share another yummy recipe! This one is a little bit spicy, a little bit sweet and totally delicious!
I’m happy to be back again for another guest post at EM2WL! It’s been a busy couple of weeks and I think we finally saw our last snow flake. I think. I hope. I can see my grill so it’s an exciting time of year. I love to grill because it’s the easiest way to impart flavor and crusty goodness without adding any fat! AND bonus points because you have less dishes to clean.
 We went to Mexico for Thanksgiving. I don’t travel during the holidays because I’m a creature of habit…or tradition. I like spending my holidays in familiar surroundings with familiar family and, even more, familiar food. Have you ever seen a turkey in Mexico? I’m sure they exist but I’m equally sure the hotel had a contract with Butterball. So, on Thanksgiving day…I had a shrimp tostada for lunch. And an enchilada for dinner. The Pilgrims would be so jealous.
USUALLY, I’m knee-deep in sausage stuffing and mashed potatoes with, constantly full, glass of wine in my left hand. This past year, I was knee-deep in the Caribbean. It was weird and surreal. I missed my familiar. I know, I sound like a brat.
Back to the tostada…my shrimp tostadas in Mexico were tiny…and they were a little on the “could use more zest” side. So, as I was stuffing my face on the beach…in Mexico…on Thanksgiving day…not with turkey and gravy…I vowed to make my own version at home. I wanted more heat, more kick, more avocado. And I wanted a fresh, fruity salsa.
The last bit of snow we had a week ago made me miss my Mexico trip a little bit…so, I whipped up a fresh, fruity salsa with an amazingly ripe and juicy mango. (So rare in these parts this time of year!) And I spiced up some shrimp and tossed them into a grill pan. (I couldn’t get to my grill…it was still under several inches of snow.) AND I whipped up a creamy, fiery chipotle sauce tamed just a little bit with some honey. Perfect. Combination.
For more delicious recipes, visit me at TheSuburbanSoapbox.com.
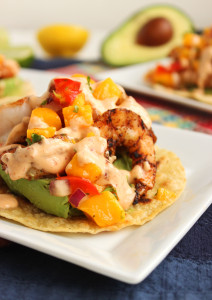
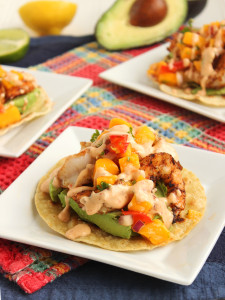
Grilled Shrimp and Avocado Tostadas with Mango Salsa and Chipotle Cream
Ingredients
- 6 6-inch corn tortillas
- 1lb medium shrimp (peeled and deveined)
- 1/4 teaspoon kosher salt
- 1/2 teaspoon garlic powder
- 1 teaspoon chili powder
- 1/4 teaspoon fresh ground pepper
- 1/2 cup low-fat plain greek yogurt (I use Chobani 2% Plain greek yogurt)
- 1 tablespoon honey
- 1 can chipotle chile (in adobo sauce)
- 1/2 teaspoon adobo sauce (from the canned chipotle chile)
- 1 mango (peeled and diced)
- 1/2 red bell pepper
- 1 tablespoon fresh parsley (chopped)
- 1/3 cup red onion (diced)
- juice and zest of one lime
- 2 avocados (sliced)
Directions
|
|
| In a small frying pan coated with cooking spray, add the tortilla and cook over med-low heat until lightly toasted and crispy. Repeat with remaining tortillas and set aside. |
|
|
| In a small bowl, combine the shrimp, salt, garlic powder, chili powder and pepper. Toss to combine. |
|
|
| Heat a grill pan over med-high heat, add the shrimp and cook for 2-3 minutes or until bright pink. Turn the shrimp over and continue to cook until no longer translucent. Transfer to a plate and keep warm until all the shrimp are cooked. |
|
|
| In the bowl of a small food processor or blender, blend the yogurt, honey, chipotle chili and adobo until smooth. Season with salt and pepper. Set aside. |
|
|
| In a medium bowl, combine the mango, bell pepper, parsley, red onion, lime zest and juice. Set aside. |
|
|
| Top each tostada with equal amounts of avocado and then top the avocado with equal amounts of shrimp. Spoon the mango salsa on top of each tostada and drizzle the chipotle cream over the salsa. Serve immediately. |
Note
You can make the chipotle cream and salsa up to two days in advance. Store in an airtight container in the refrigerator until ready to serve.
by Trish Adams | Mar 12, 2014 | Main Dish, Recipes
Team EM2WL would like to extend a warm welcome to our newest guest blogger, Kellie, from The Suburban Soapbox! Today Kellie shares a healthy and delicious stir-fry recipe the whole family will enjoy!
I’m so excited to be a guest blogger here at EM2WL! We share the same philosophy about food and understand that being healthy and losing weight doesn’t mean you need to sacrifice on flavor. I live to eat…I mean, I think about food constantly during the day…sort of obsessively so every move, every exercise, every step I take is so I can enjoy eating the things I love! But…I also believe everything is good in moderation and that’s why I, also, take some of my favorite recipes and make them a bit healthier. A little ying and yang of food, if you will.
Here is a family favorite in my house and a little story to go along with it. Thank you, Trish, for inviting me to be a part of your happy family here at EM2WL! I look forward to sharing more of my tasty favorites in the very near future!
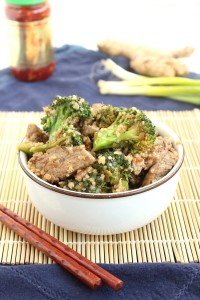 This is the easiest recipe I ever made. Originally made with the help of a bottled stir-fry sauce, one look at the sodium content and I knew I needed to make some modifications. And as much as I love white rice, quinoa is just a better option when you’re trying to pack in some nutrients.
Plus…I really only love white rice that’s swimming in butter. Or in a sushi roll, but even then I could really just do without. It’s a thing with me…I know it’s weird.
You can cut the beef up in advance, as well as, the broccoli to save time. And leftover quinoa is definitely the way to go with this recipe. So, if you’re making something with quinoa for dinner earlier in the week…always make a little extra to throw into a stir-fry.
Another thing I did a little differently, I threw the quinoa into the stir-fry pan at the end. To get it a little crispy. And to make sure it was all mixed up with the other ingredients. Most places throw the mixture onto of the rice but I felt like that method left the quinoa too bland. Plus, I love that it gets all mixed into the broccoli florets
Leftovers keep well for lunch the next day. So you won’t need to hit up McDonald’s. Like I did today. (Yes, I regret my choices. Moving on.)
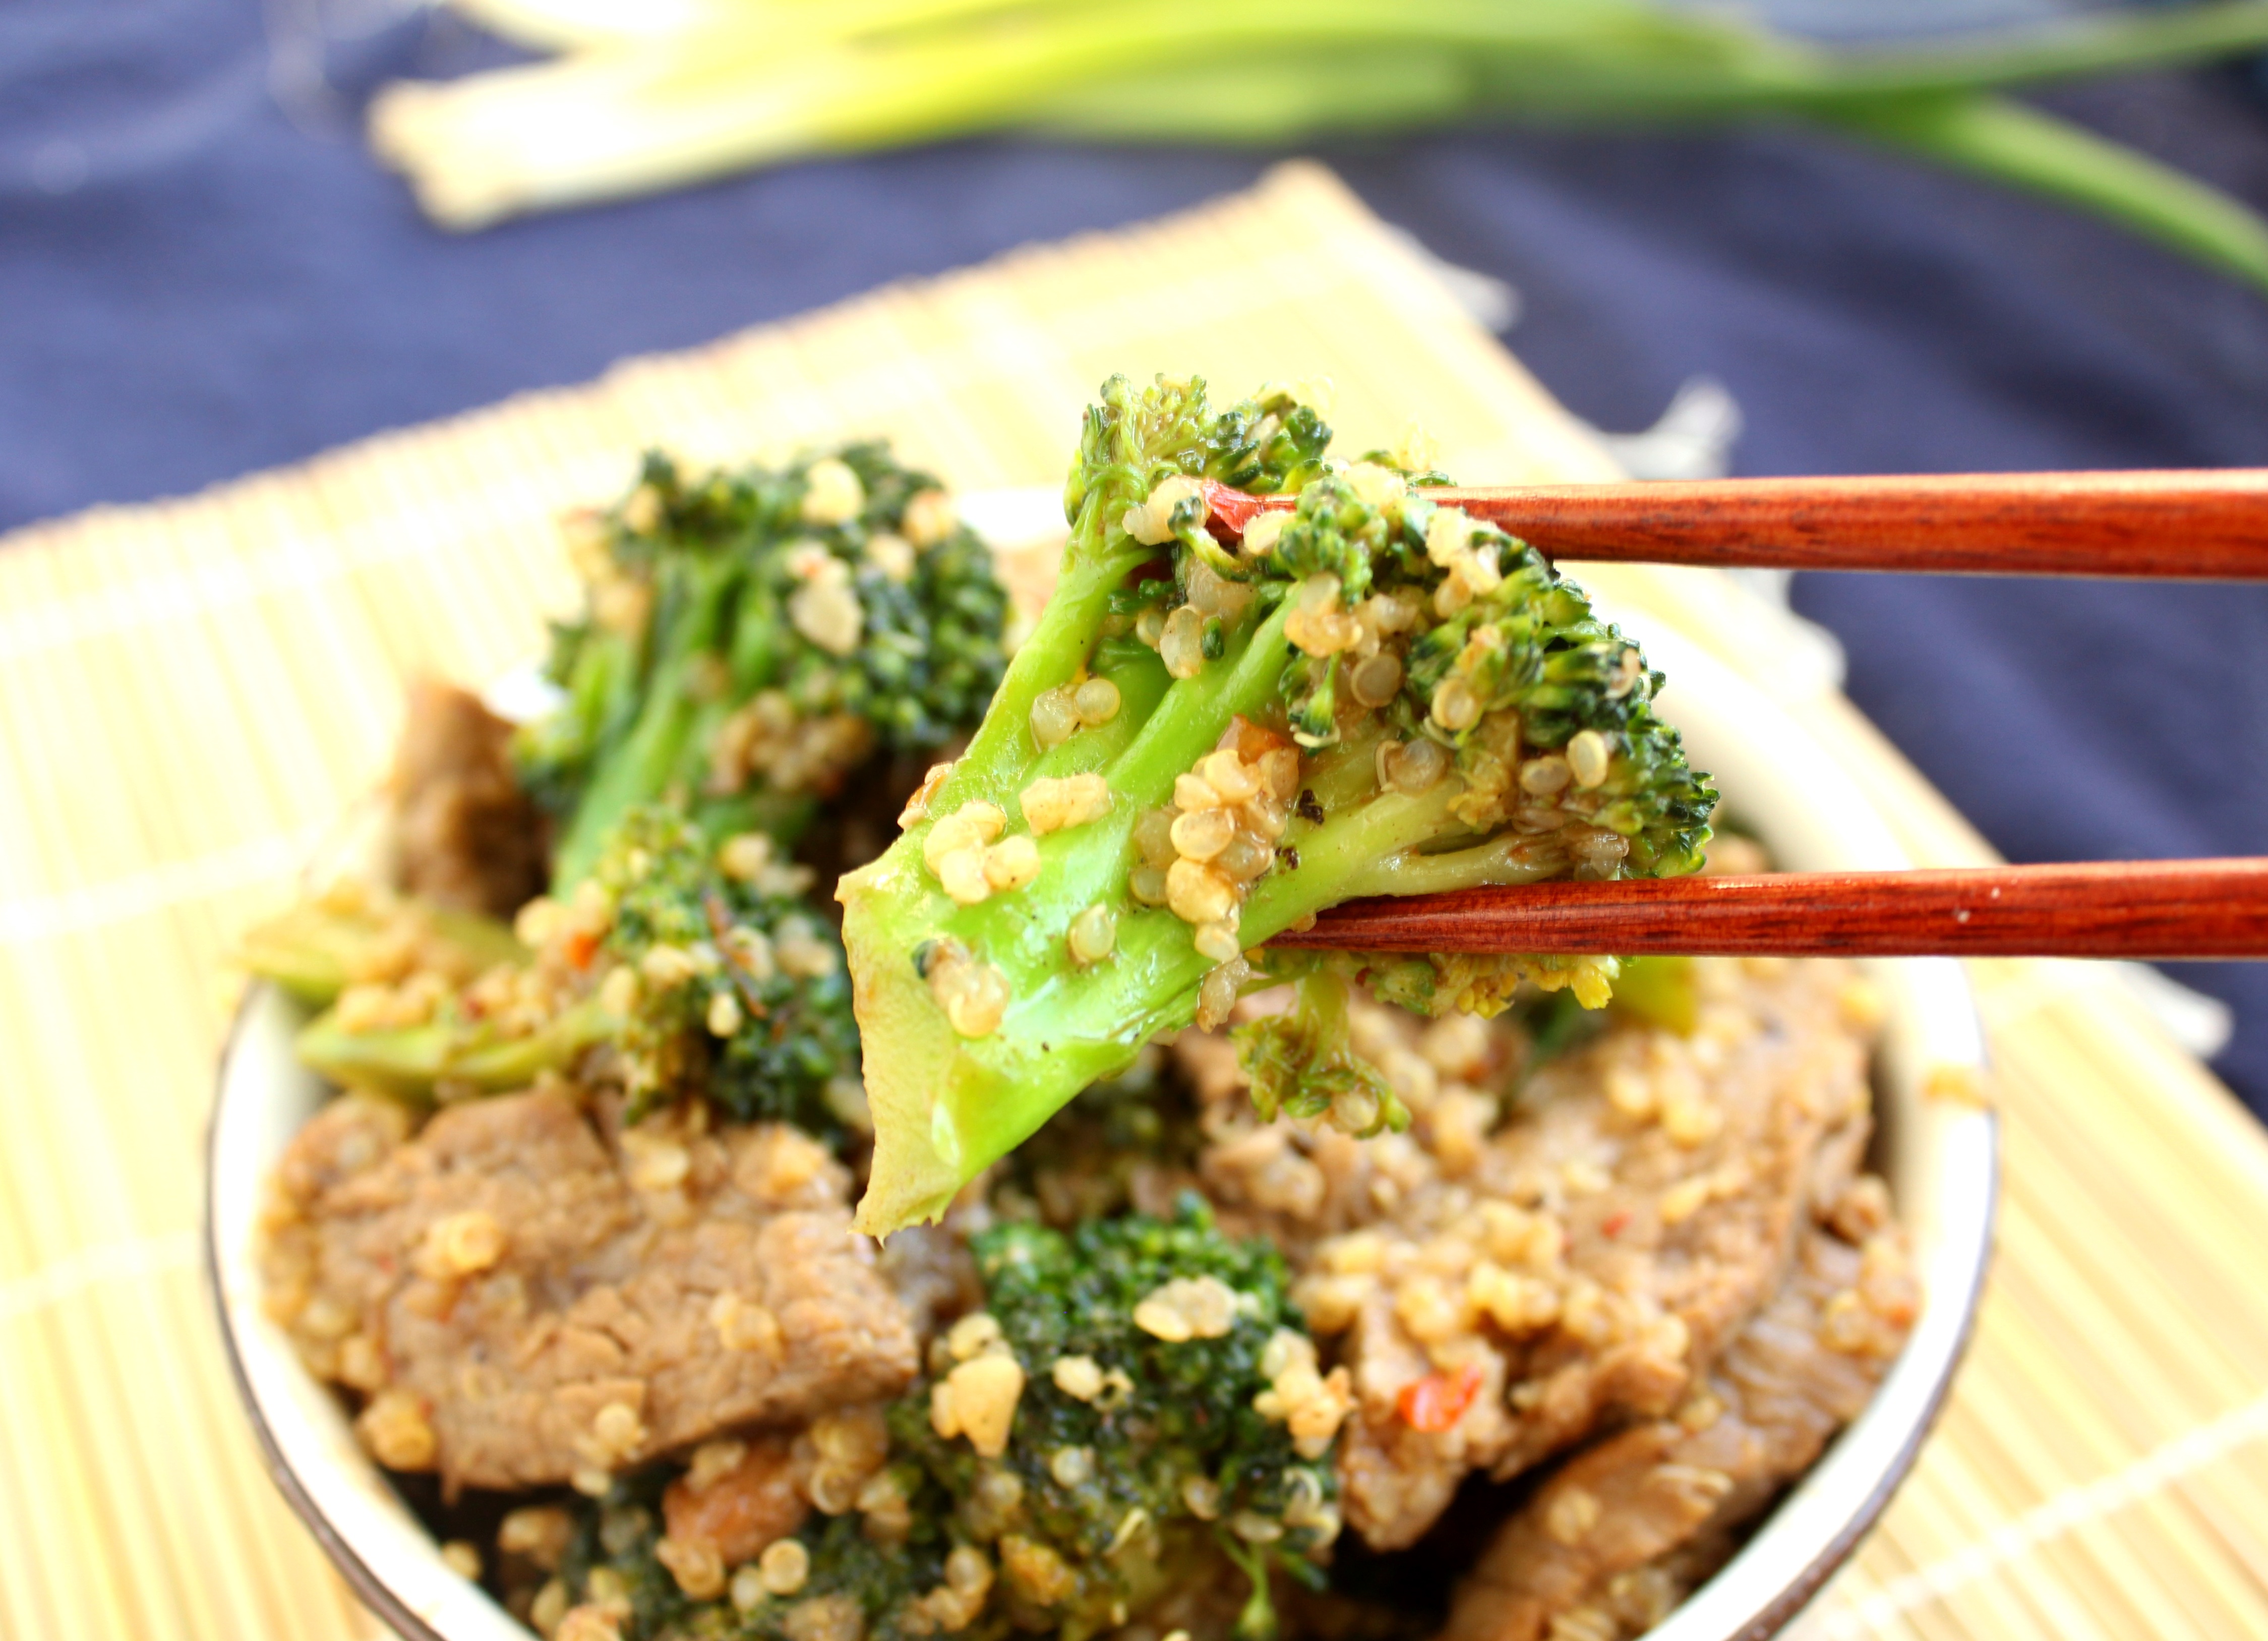
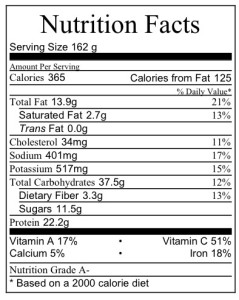
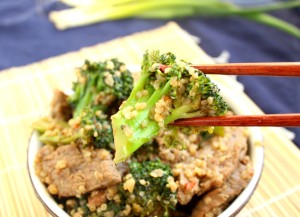
Beef, Broccoli and Quinoa Stir-Fry
A new take on an old favorite, this nutrient packed Beef Broccoli and Quinoa Stir-fry from www.TheSuburbanSoapBox.com will be a hit with the whole family!
Ingredients
- 4 tablespoons chili paste
- 1 teaspoon toasted sesame oil
- 1-1/2 cup cooked quinoa (I use Bob’s Red Mill)
- 3 tablespoons rice vinegar
- 3 tablespoons ginger (minced)
- 1/4 cup honey
- 1/4 cup low sodium soy sauce
- 1lb flank steak (cut across the grain into 2 inch x 1/4 inch pieces)
- 2 tablespoons cornstarch (I use Clabber Girl)
- salt and pepper
- 3 tablespoons canola oil
- 3 cups fresh broccoli (chopped)
- 3 cloves garlic (minced)
Directions
|
|
| In a large bowl, toss the steak with the cornstarch to coat and season lightly with salt and pepper. |
|
|
| In a small bowl, whisk together the honey, soy sauce, rice vinegar, chili paste and sesame oil. Set aside. |
|
|
| Heat 2 tablespoons of oil in a large wok, stir-fry pan or skillet over medium-high heat and add the steak to the pan. Working in batches if necessary, cook the steak until brown and no longer pink. Move the steak to the sides of the pan and add the broccoli. |
|
|
Cook the broccoli until bright green and then move to the sides of the pan with the steak. Add the remaining tablespoon of oil to the pan and add the ginger and garlic, cooking for 1 minute.
|
|
|
| Add the quinoa and cook for 2-3 minutes, stirring occasionally and then mix all the ingredients together in the pan. Add the sauce mixture and stir to combine thoroughly. Continue cooking for 2-3 minutes and then serve immediately. |
by EM2WL | Sep 9, 2013 | Recipes
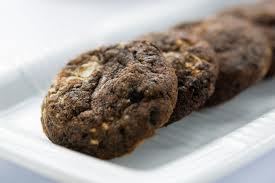
She had me at “Dark Chocolate”…I can’t wait to try out these yummy sounding Dark Chocolate PB Protein Cookies shared by Emily Zaler, author of The EZ Whey Cookbook. If you like these, be sure to check out her cookbook for more inventive recipes using protein powder.
Dark Chocolate Peanut Butter Protein Cookies
Low Carb Dark Chocolate PB Protein Cookies
Ingredients
- 1 scoop About Time Peanut Butter Protein
- 1 cup Canned Pumpkin
- 1 cup Liquid Egg Whites
- 1 cup Natural Peanut Butter or Almond Butter
- 1/2 cup Unsweetened Dark Chocolate Cocoa Powder
- 1/2 cup Flaxseed
- 3-4 packets Stevia (to taste)
- 1 teaspoon Baking Powder
Directions
|
|
| Preheat oven to 350 degrees |
|
|
| Mix all ingredients together in a large mixing bowl. |
|
|
| Drop by the tablespoon on to a cookie sheet lined with foil or sprayed with non-stick cooking spray. |
|
|
Bake for about 10 minutes or until firm.
|
Note
Nutrition Information Per Cookie:
100 Calories, 7 grams of Fat, 4 grams of Carbs, 6 grams of Protein
 Emily Zaler is a Certified Personal Trainer, Certified Sports Nutritionist, Author of The EZ Whey Cookbook, Magazine Columnist, Personal Chef, and Owner of The EZ Whey LLC. She holds her Bachelors of Science in Exercise and Wellness from Arizona State University. Emily and The EZ Whey have been featured in multiple media outlets worldwide, including Print, Television, Radio Shows, Online features, Newspapers, and Magazines. Top publications such as The LA Times, Chicago Tribune, Oxygen Magazine, Muscle and Fitness Hers, Runner’s World, Max Sports & Fitness, Physique Magazine, World Physique Magazine, Extra Fit Magazine, STACK Media, Inside Fitness Magazine, Scottsdale Health, Natural Bodz, and many more, have all featured Emily and The EZ Whey.

 recipe packed full of protein that you can enjoy any time of the day, while still satisfying that craving for something sweet. And the best thing? It is very easily adaptable depending on ingredients you have on hand and the portion size you would like to create… Also, feel free to add berries or bananas to switch things up – use your imagination and build on the basic recipe!


 Print recipe







Recent Comments